I became passionate about styles and numbering after seeing repeated examples of mis-numbering and flawed cross referencing. It is tempting to number clauses by hand, and type in cross references. However this quickly falls apart when a document needs to be edited. When clause numbers need to change, they need to be updated manually and cross references end up pointing in the wrong place.
This can exhibit as references to incorrect clauses, or clauses that do not exist, or multiple clauses with the same number or clause numbers being skipped. These errors are avoidable by using Word’s multi-level list feature.
Bizarrely, despite how important it is, multi-level numbering in Word is not natively handled by, or linked in with Word’s styles. Each of the characteristics below is not linked to or controlled by Styles. This post explains the basics of using multilevel lists. Future posts will cover how to make them work with Styles and other tips and tricks.
Multi-level lists lets you define 9 levels of hierarchy. Each level may have its own number, its own level of indent, and may refer to higher levels (enabling numbering like “3.4.2”). A document may have several multi-level lists, each with its own hierarchy.
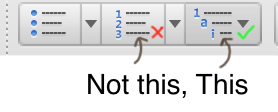
The first thing to know about numbering complex documents in Word is it is essential to use the “multilevel list”, not regular “numbered list”. This is particularly important as when you have a list item selected, Word will highlight numbered list to make it look like the regular “numbered list” is selected. Only modify lists through the “multilevel list” button. Just pretend the “numbered list” button does not exist.
The second thing to know is that for some reason, Word does not give you an option to “edit” a multi-level list. Even if you already have a multi-level list, you must “define new Multi-level list”.
Lets jump into the detail of the defined multi-level list. The window that appears when you go to define multi-level list shows only some of the options. You will want to expand this window to see all the options.
Word 2011 – Condensed 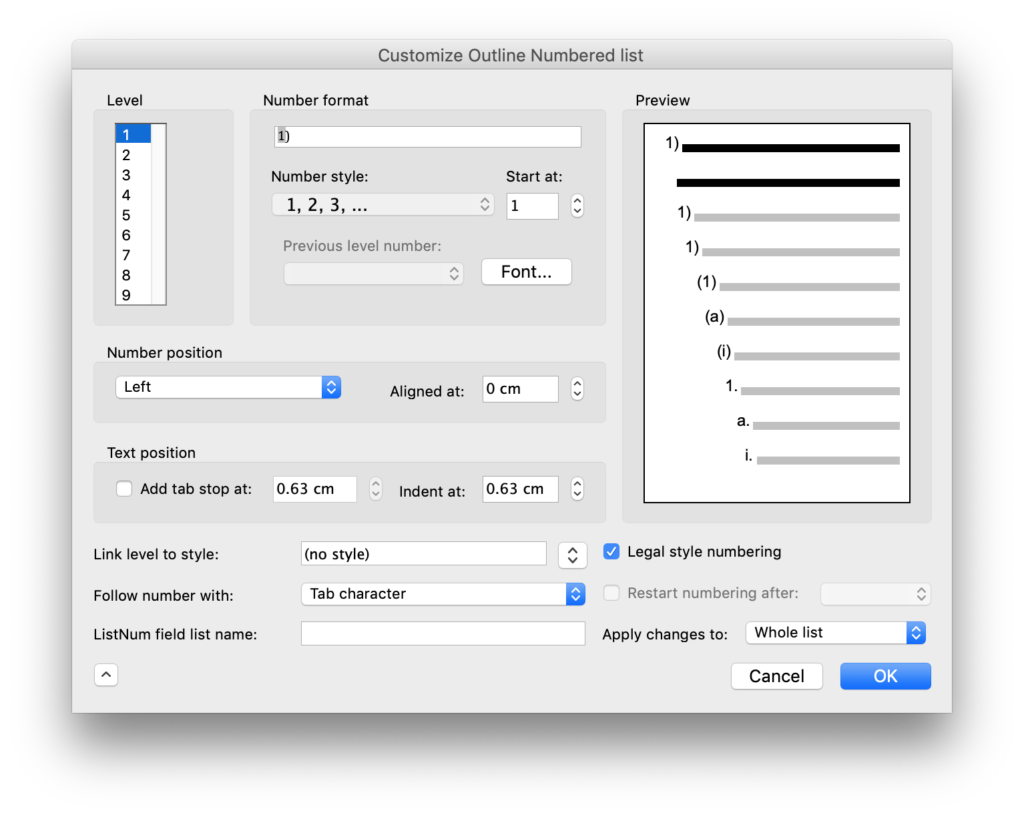
Word 2011 – Expanded 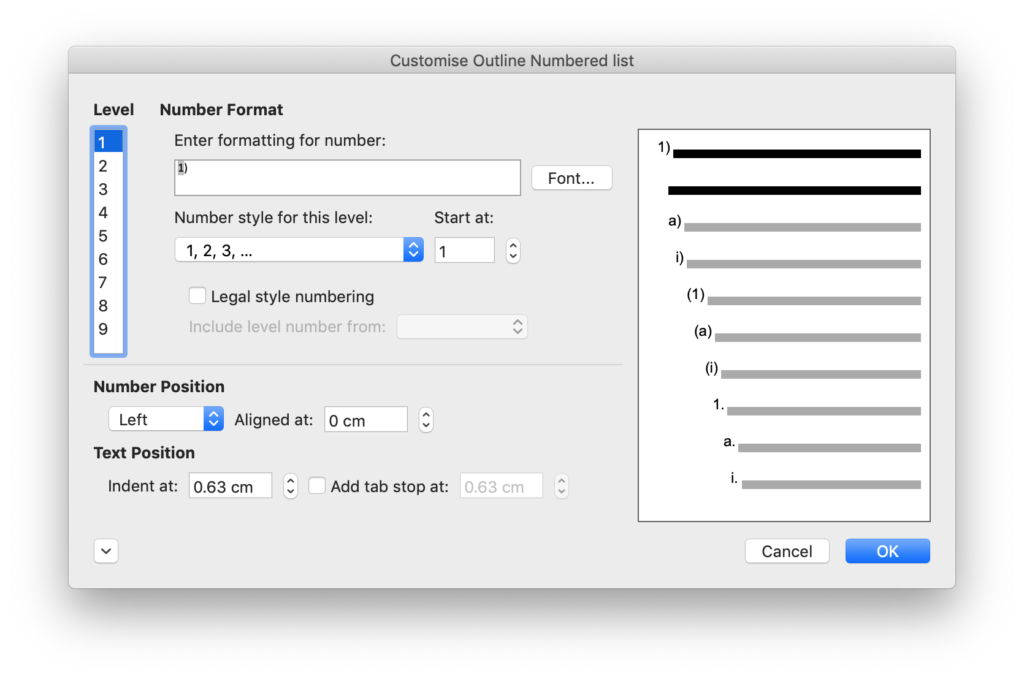
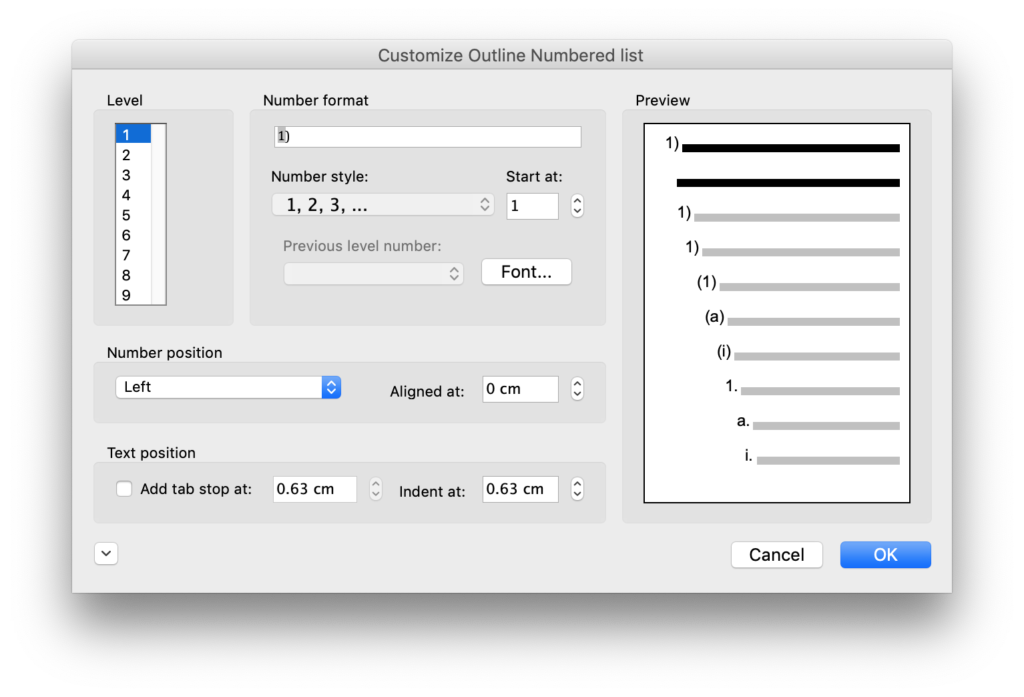
Word 2019 – Condensed 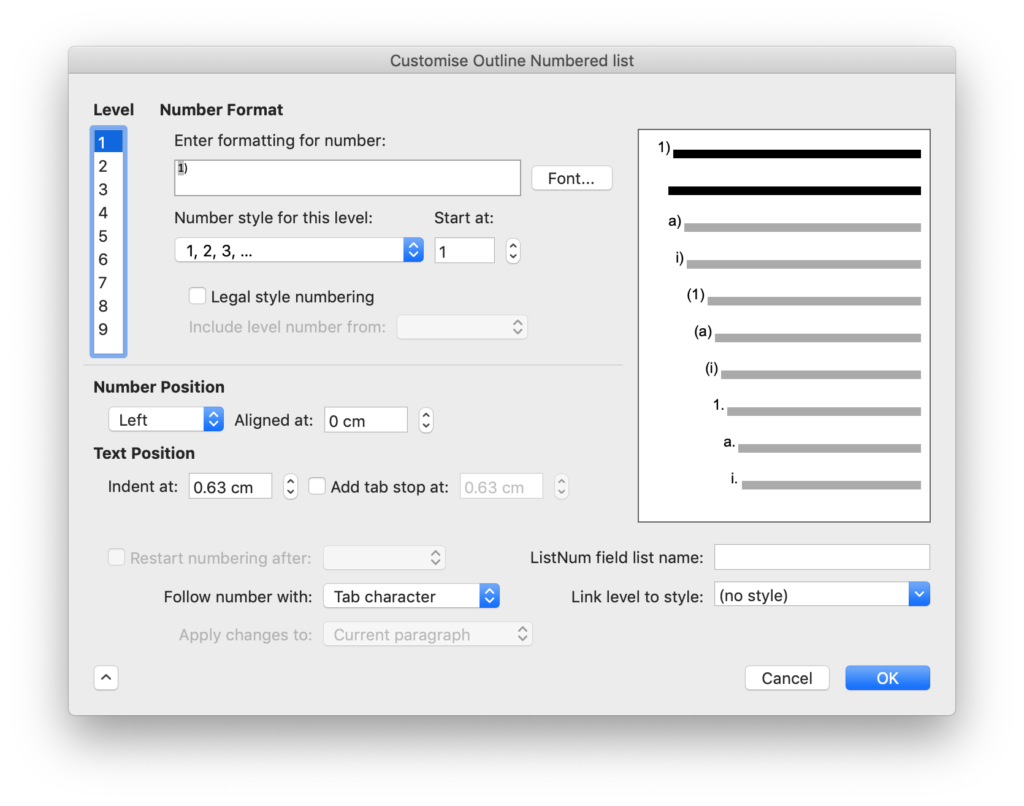
Word 2019 – Expanded 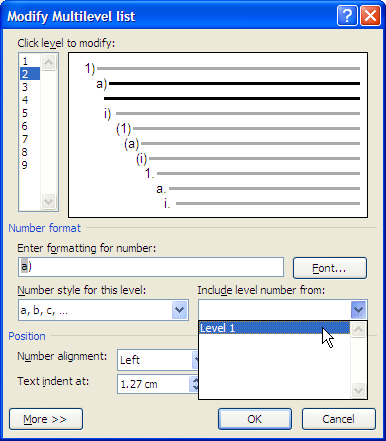
Word 2010 – Condensed 
Word 2010 – Expanded
Level: Word gives you 9 levels of list. In my experience this is sufficient for any complex document. There are generally spare levels to allow you to use a level to overcome some of the limitations of multi-level lists. Have some thought about which levels are needed before you start. The levels cannot be rearranged. There is no way insert a new level between two levels other than to manually change each of the subsequent levels.

Number Format: This edits what goes next to each numbered paragraph. It is fairly self-explanatory. The “Formatting for number” box is what will appear. “Font” controls what the font is used. It is important to note that this font is not linked to styles. “Number style for this level” controls what it says it does. The options available (in Word 2019) are shown to the right. The “Include level number from” includes the earlier level number (or letter, etc). “Start at:” lets you start the numbering at a later number. “Legal style numbering” causes all of the number styles to be changed to arabic numbering for this level. For example, if the first level was ‘B.’. The second level was ‘B-IV.’ And the third was to be ‘B-IV-3’. “Legal Style Numbering” will cause this to render it as ‘2-4-3’. I have rarely found a use for this. “Restart list after:” defines if the numbering for a level will reset, after a higher level is used. Ordinarily this will be the level immediately above the current level, but there may be circumstances where it is not appropriate to reset a level when the immediate higher level is reset.
Number Position: These controls define where the number will appear. “Aligned at:” is the horizontal location for the number. “centre” will cause the number to be centred at that point. “right” will cause it to be right aligned (extend to the left). “left” will cause it to be left aligned (extend to the right).
Text Position: This controls how the text will appear alongside the number. Unsurprisingly “Follow number with” defines which whitespace character (if any) will follow the number. “Text indent at:” controls the “left indent” on the paragraph. “Add tab stop at:” allows an optional tab stop to be specified. In most circumstances, it will be appropriate to follow the number with a tab character, which will cause the associated text to appear as a block with the associated number to the left. However there is enough flexibility to be useful in a variety of settings.
Link level to style: This characteristic allows each level to be linked to an existing style. It is important to note that all this does is causes the style to be applied to a paragraph when the level is selected, and cause the numbering to be applied to a paragraph when the style is selected. It does not unify the characteristics defined separately in the style and the numbering, such as font, tab stops, alignment and indenting. If these are different Word can display some odd behaviour.