Paste format allows you to apply the direct formatting from one paragraph of a document to another. On its face, “paste format” appears to be a functional alternative to using styles. It solves the consistency problem with direct formatting instead of styles. Is this a simple solution to the other frustrations with styles? No!
While paste format does leave you with two consistently formatted paragraphs, it does not make managing the document easier in the future:
The formatting of the two paragraphs are not linked; changing one paragraph will not affect the other;
it does not make it easier to apply those characteristics to other paragraphs in the future;
it does not have any of the other features of styles that make working with Word easier.
If you are being tempted with paste format, give styles a go. Of course if you are using a properly styled document, just apply the appropriate style… but if you were already using styles, paste format would have no temptation. But even with a poorly styled document, using styles are an effective alternative to Paste Format – simply create a new style from the paragraph you want to copy the formatting from, then apply that style to the second paragraph. This is not best practice, but it is preferable to paste format. Now you have started, consider styling the rest of the document.
As expanded elsewhere, the main concern when first using styles is mixing them with direct formatting. The best way to avoid this is to become very comfortable making new styles. While reuse of styles is key to their usefulness, never take an existing style and just change the indent, or make any other paragraph-wide change without creating a new style. Create a new style whenever a paragraph is distinct from any previously created style. In other words, if there are no previous styles that are appropriate and you feel compelled make a change to a whole paragraph (ie other than bolding a single word), create a new style.
Word for Mac 2018
Word for Mac 2011
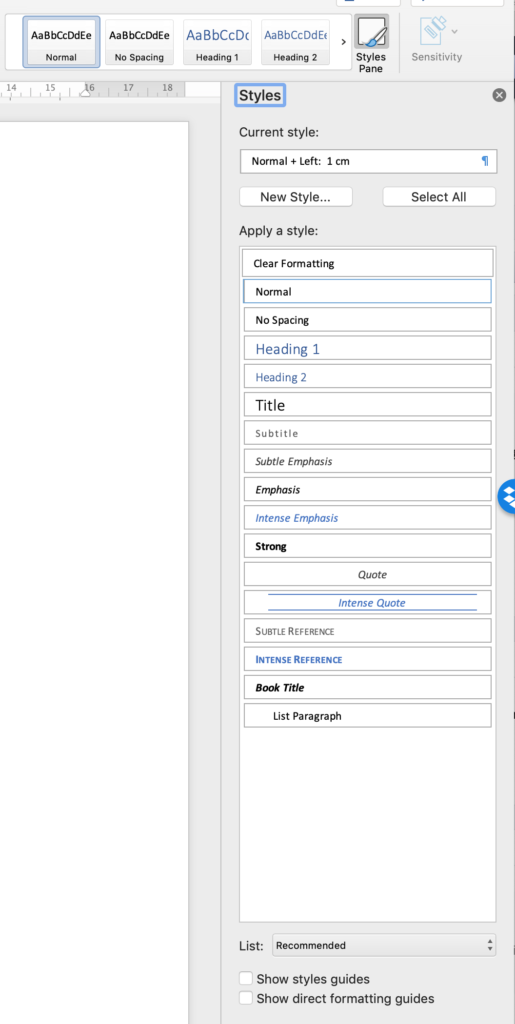
The most accessible way to create a new style is through the “Styles Pane”. I recommend always having this open when using Word, as it makes using styles easier.
There are different ways to create and modify styles. They can be safely mixed and matched. There is no “correct” approach, but I recommend starting by cloning an existing style, and becoming comfortable with the modify style dialogue box.
Word 2011 – Style pane modification
Word 2011 – Ribbon modification
Word 2018 – Ribbon modification
Word 2018 Style pane modification
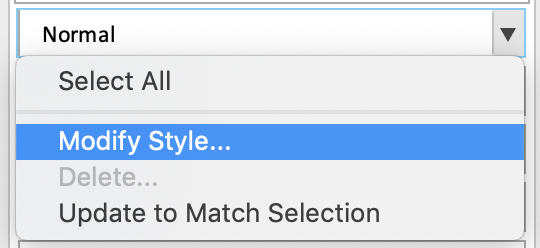
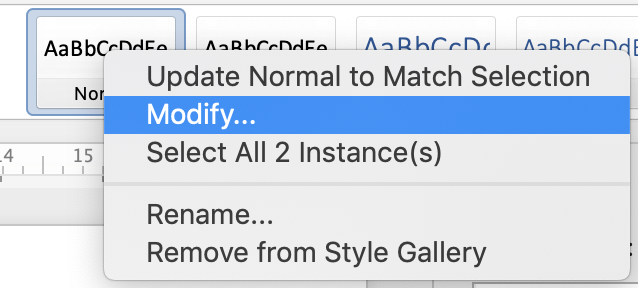
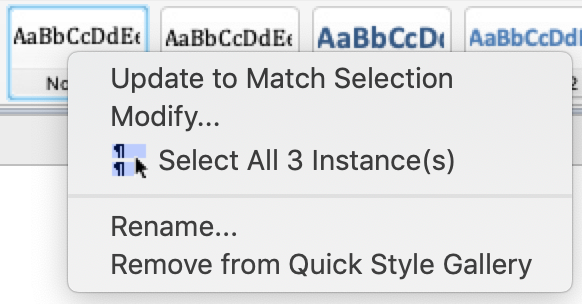
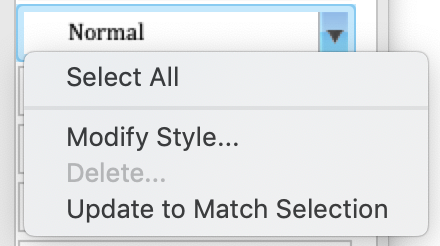
Clone an existing style, and then modify the new style. Select a similar style, then create a new style without making any other modifications. Once the new style is created, select the style, and modify it (generally this can be done by clicking the down arrow next to a style or right clicking on the style and selecting “Modify…” or “Modify Style…”). From the modify style window, the different characteristics of the style can be modified directly. This approach is less WYSIWYG, but the changes can be made directly to the characteristics.
Modify an existing paragraph before creating a new style. When a new style is created from a paragraph with paragraph-level direct formatting (ie not changes to individual words), the new style adopts and those styles and removes the direct formatting. For example, a paragraph is nominally the “normal” style, but it has been indented 1cm. Creating a new style when that paragraph is selected will result in a new style that has the new indents. This approach can be useful if the edits are easiest to make visually. It can also be very useful when working with an existing (predominantly direct-formatted) document. I will talk about how to convert a directly formatted document to styles in more detail in a later post.
Once a style is created, it can be further modified either using the “Modify…” button mentioned above, or by directly formatting the paragraph, and directing Word to “Update the to match selection” (another option that appears with “Modify…”). This is essentially the counterpart to creating a new style from a directly formatted paragraph. As in that case, “Updating the style to match selection” embeds the direct formatting into the style. In general I discourage this approach, as it can be risky. If the paragraph has direct formatting you are not aware of, the characteristics of that direct formatting will become embedded into the style without your knowledge. However despite the risk, there are circumstances when this is essential.
These are probably the characteristics that require the most changing throughout a document.
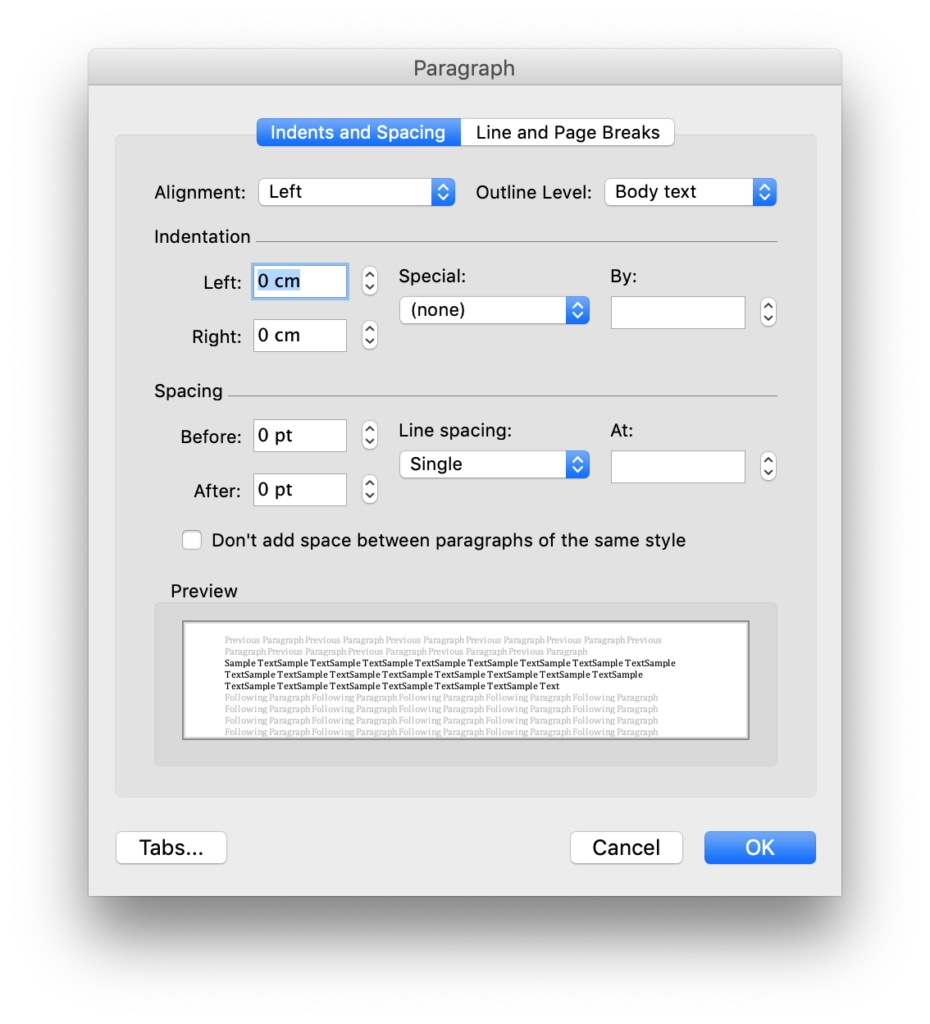
Indents and spacing
Word 2011 for Macintosh
Word 2019 for Macintosh
Paragraph alignment
Hopefully these are apparent. The simple way to think about it is “indentation” is horizontal white space, while “spacing” is vertical white space.
Alignment: Left causes the left side of the paragraph to be aligned.
Alignment: Right causes the right side of the paragraph to be aligned.
Alignment: Centre align causes the paragraph to be aligned centrally – in other words, each line with have equal white space on each side.
Alignment: Justified causes both sides of the paragraph to be aligned (other than the right character of the last line). It does this by adding extra space between the characters within the line.
Outline level
Outline level is an invisible characteristic that tells Word about the importance of the paragraph in the structure of the document. Word relies on outline level for some features, perhaps most obviously table of contents. The levels are numbered, with the most important being Level 1. Body text is text that does not have any level. In short, use the levels for headings, and body text for everything else.
“Outline level” is also used in the “outline view”, and the navigation pane.
Indentation
This controls the horizontal white space within the “paragraph box”. For regular paragraphs, the paragraph box will be defined by the margins of the page. For paragraphs inside a table, this is defined as the margins of that table cell.
Left / Right – this is the spacing from the right and left side of the paragraph box. A paragraph can extend beyond the paragraph box by putting negative numbers here.
Special – First line – this causes the first line of the paragraph to be specially indented, with the remainder of the paragraph having the otherwise assigned indent.
Special – Hanging – this is the opposite of “first line”. The first line has the assigned indentation, while the remainder of the lines are separately indented by the distance given.
Mirror Indents – this switches the “left/right” indents to “inside/outside”. This is useful when preparing a document that will be printed on two sides, and bound. It changes the control of spacing from the left and right of an individual page to the “centre”, and “edge” of a bound document.
Spacing
“Spacing” controls the vertical white space, between paragraphs as well as inside.
“Before” / “After” is how much space there is before and after each paragraph. This can be set to “Auto”, which appears to be the same as “14pt”. I have no idea why.
Line spacing – This controls how much spacing there is between each line of text. There are many options
“Don’t add space between paragraphs of the same style” does pretty much what it says – it eliminates the “before” and “after” spacing between paragraphs of the same style. However it does not override “line spacing”.
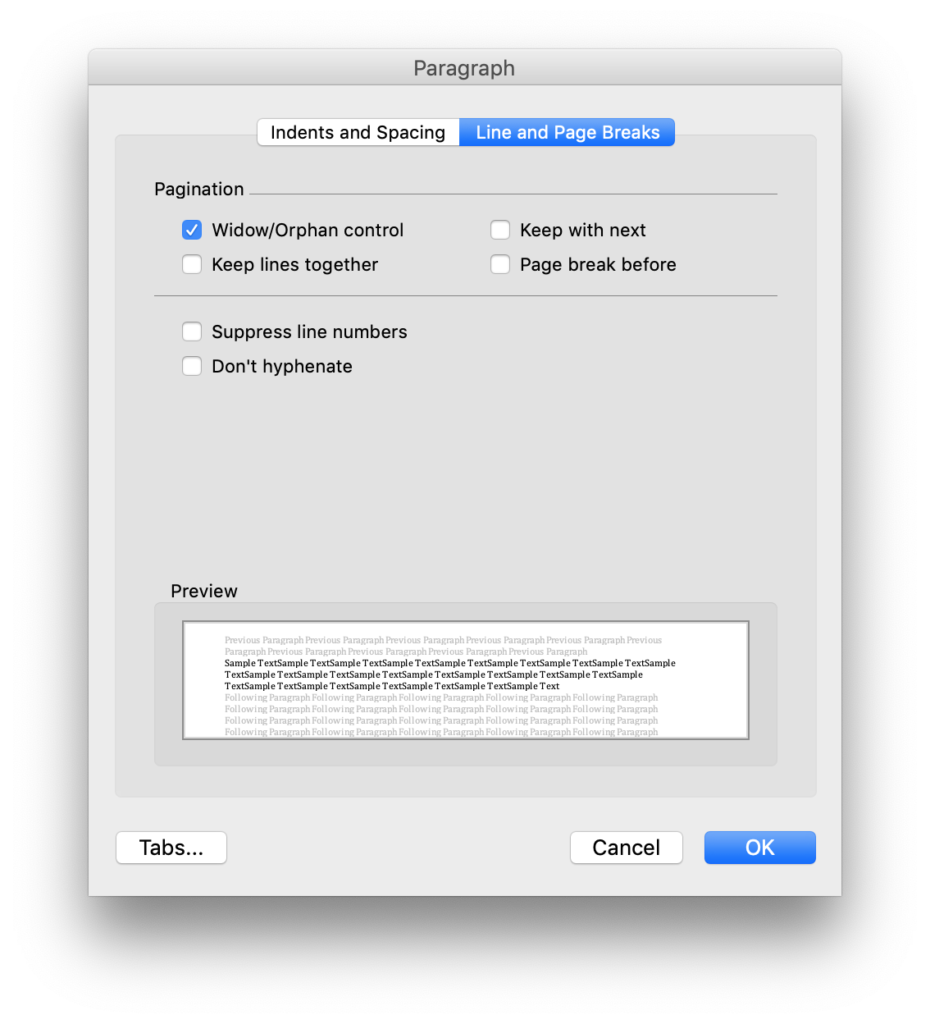
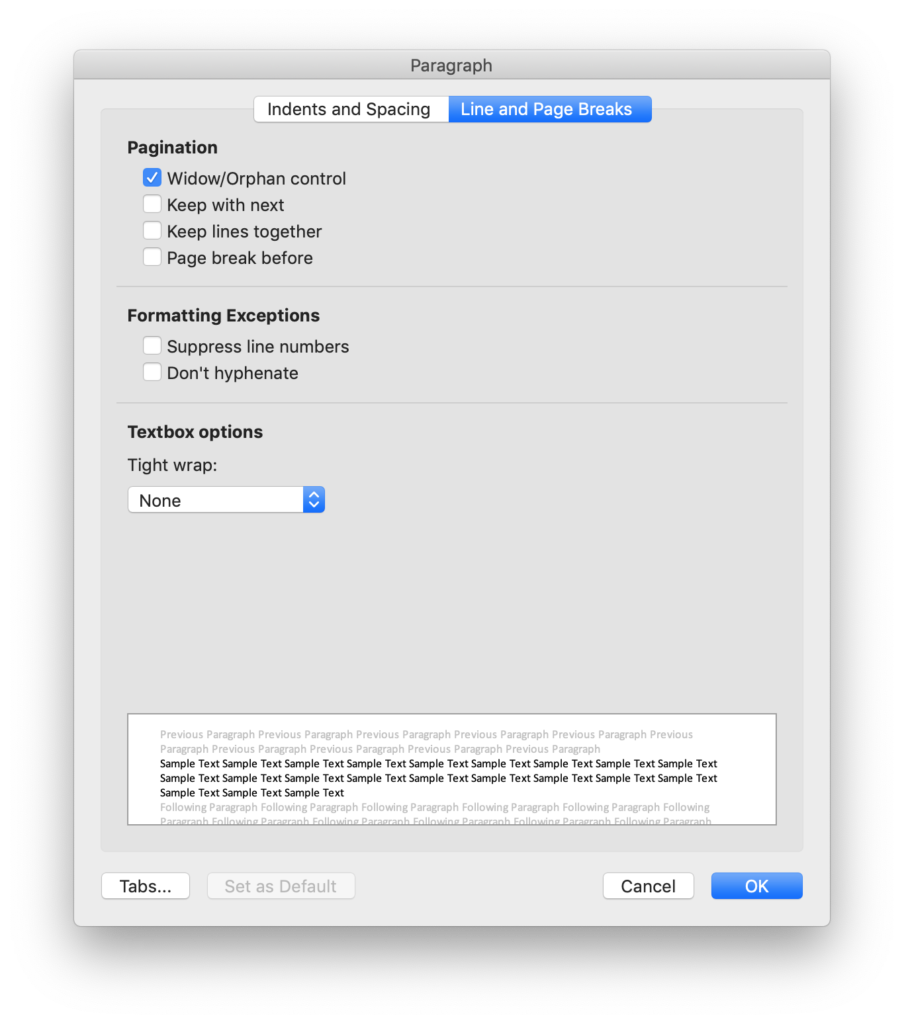
Line and Page Breaks
Word 2011 for Macintosh
Word 2019 for Macintosh
These controls are generally less obvious, but they are essential to construct a competently formatted document. If Word is showing formatting marks and one of these characteristics is active (other than widow/orphan control), a little black square will appear just to the left of the paragraph to make it clear that Word is treating these paragraphs differently.
Many of these characteristics control when Word can break text across pages, incorrect use of which which can cause Word to behave oddly with page breaks. For example, Word will not split consecutive paragraphs with “keep with next” and “keep lines together”. If Word is forcing a paragraph onto the next page for no apparent reason, check to see if these characteristics are being misused.
Widow/Orphan control – This unfortunately named feature relates to when a single line of a paragraph is left by itself when the paragraph is split across pages (or columns). Widows are the last line of a paragraph alone at the top of a page. Orphans are the first line of a paragraph abandoned at the bottom of a page. Turning on this function eliminates widows and orphans by ensuring that there is at least two lines of a paragraph on each page (or column). This can be useful for aesthetic and context.
Keep with next – paragraphs with this characteristic are bound to the following paragraph. If the paragraph after this is on the next page, this paragraph will follow it over. This is an essential feature for headings, as it ensures the heading is not left at the bottom of a page without any text it relates to.
Keep lines together – This prevents a paragraph from splitting across pages. This can be useful for headings.
Page break before – This causes a page break immediately before the paragraph. This is a brilliant feature where a section of a document (such as a Schedule) should start on a new page.
Suppress line numbers – Paragraphs will not count towards the line numbers. Line numbers will also not appear next to these paragraphs.
Don’t hyphenate – I have never used this one. I expect it causes Word to block hyphenation in this paragraph.