Introduction to Numbering

I became passionate about styles and numbering after seeing repeated examples of mis-numbering and flawed cross referencing. It is tempting to number clauses by hand, and type in cross references. However this quickly falls apart when a document needs to be edited. When clause numbers need to change, they need to be updated manually and cross references end up pointing in the wrong place.

This can exhibit as references to incorrect clauses, or clauses that do not exist, or multiple clauses with the same number or clause numbers being skipped. These errors are avoidable by using Word’s multi-level list feature.

Bizarrely, despite how important it is, multi-level numbering in Word is not natively handled by, or linked in with Word’s styles. Each of the characteristics below is not linked to or controlled by Styles. This post explains the basics of using multilevel lists. Future posts will cover how to make them work with Styles and other tips and tricks.

Multi-level lists lets you define 9 levels of hierarchy. Each level may have its own number, its own level of indent, and may refer to higher levels (enabling numbering like “3.4.2”). A document may have several multi-level lists, each with its own hierarchy.

The first thing to know about numbering complex documents in Word is it is essential to use the “multilevel list”, not regular “numbered list”. This is particularly important as when you have a list item selected, Word will highlight numbered list to make it look like the regular “numbered list” is selected. Only modify lists through the “multilevel list” button. Just pretend the “numbered list” button does not exist.
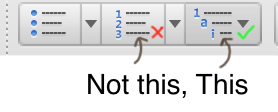
Winners don’t use numbered list

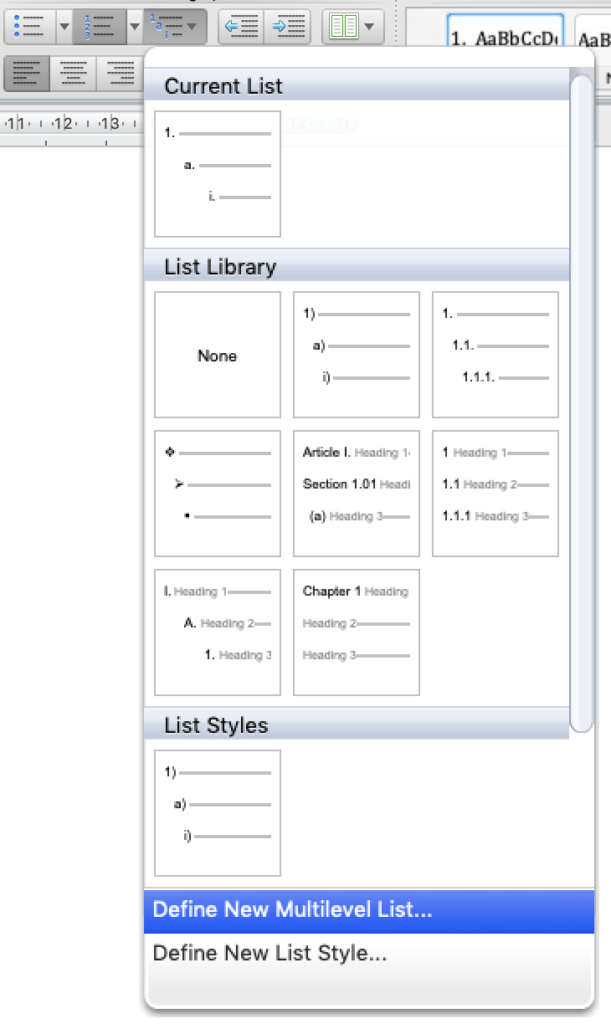
The second thing to know is that for some reason, Word does not give you an option to “edit” a multi-level list. Even if you already have a multi-level list, you must “define new Multi-level list”.

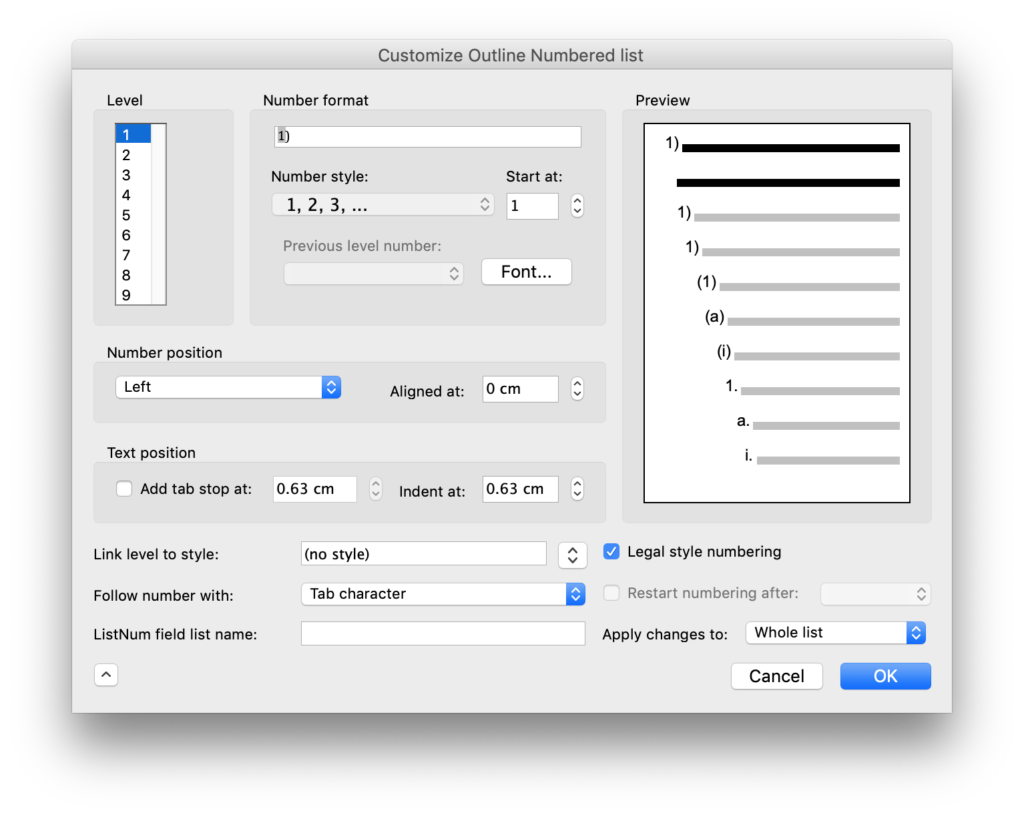
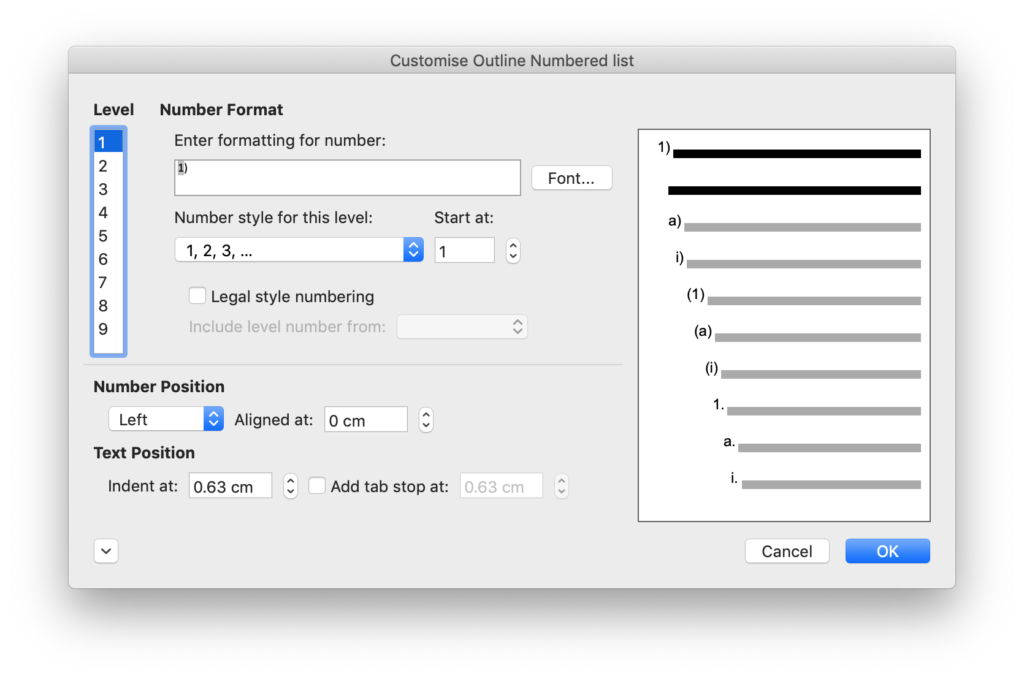
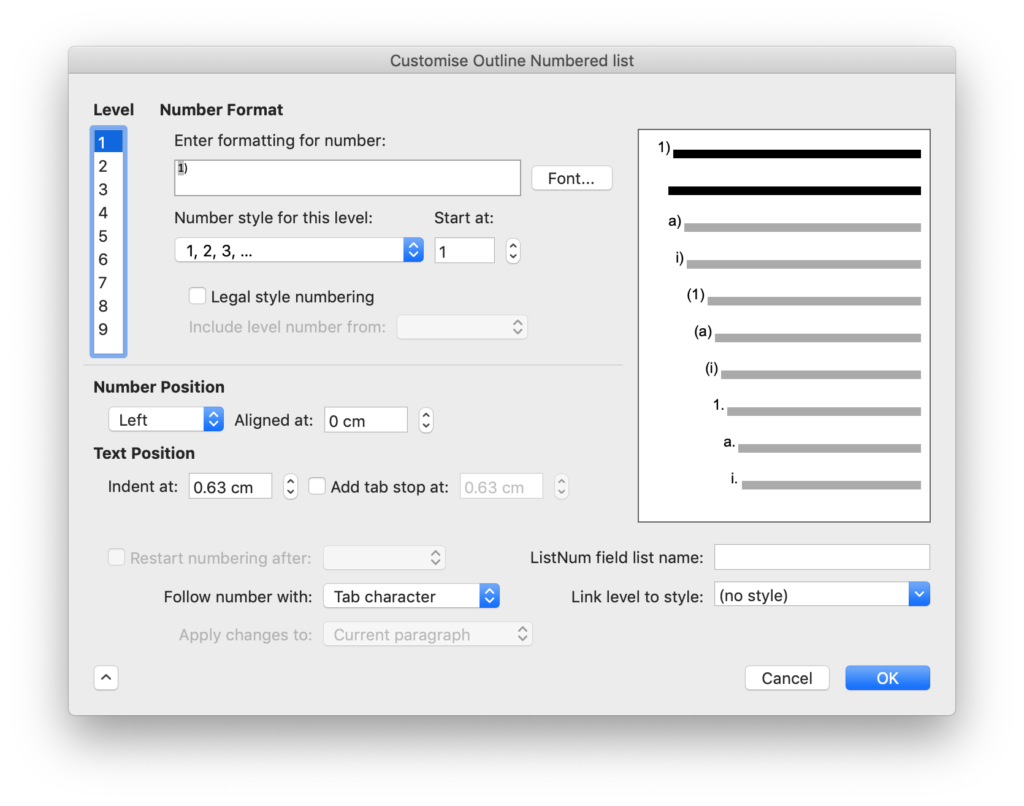
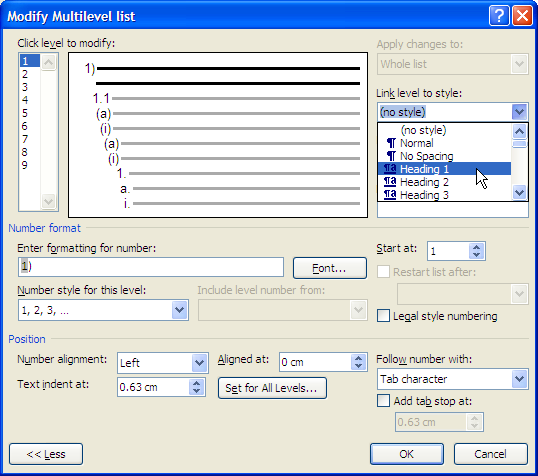
Lets jump into the detail of the defined multi-level list. The window that appears when you go to define multi-level list shows only some of the options. You will want to expand this window to see all the options.
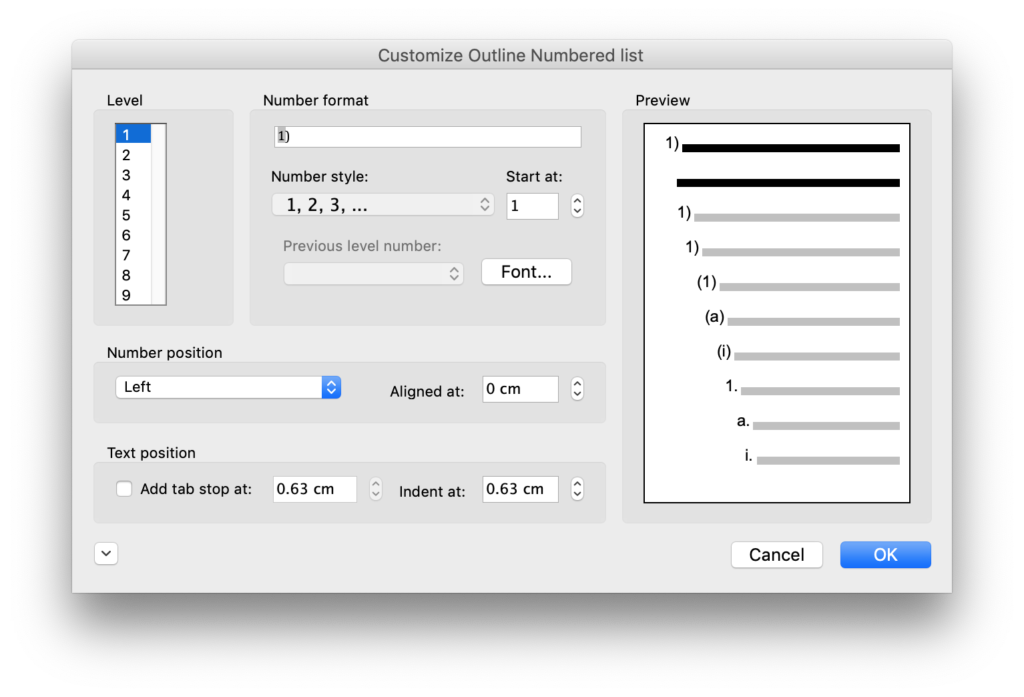
Level: Word gives you 9 levels of list. In my experience this is sufficient for any complex document. There are generally spare levels to allow you to use a level to overcome some of the limitations of multi-level lists. Have some thought about which levels are needed before you start. The levels cannot be rearranged. There is no way insert a new level between two levels other than to manually change each of the subsequent levels.
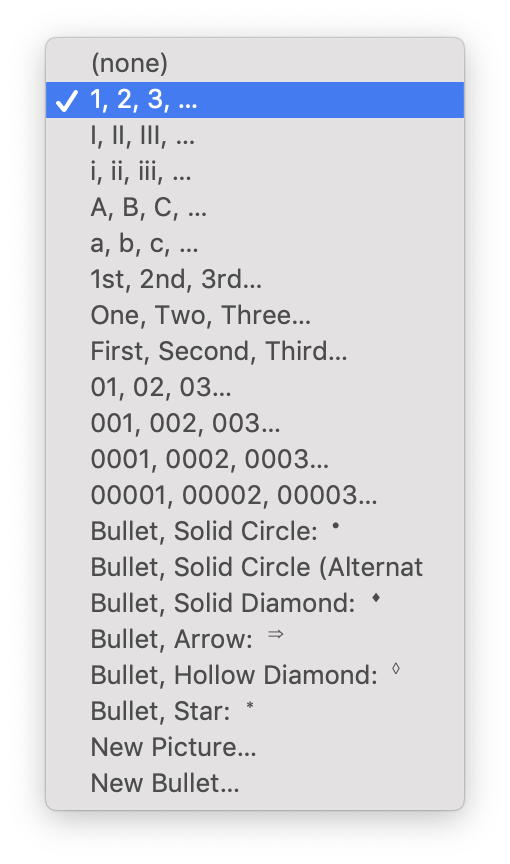
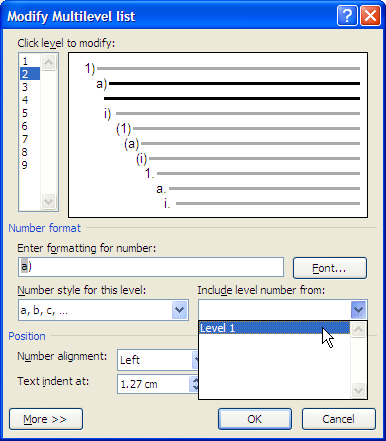
Number Format: This edits what goes next to each numbered paragraph. It is fairly self-explanatory. The “Formatting for number” box is what will appear. “Font” controls what the font is used. It is important to note that this font is not linked to styles. “Number style for this level” controls what it says it does. The options available (in Word 2019) are shown to the right. The “Include level number from” includes the earlier level number (or letter, etc). “Start at:” lets you start the numbering at a later number. “Legal style numbering” causes all of the number styles to be changed to arabic numbering for this level. For example, if the first level was ‘B.’. The second level was ‘B-IV.’ And the third was to be ‘B-IV-3’. “Legal Style Numbering” will cause this to render it as ‘2-4-3’. I have rarely found a use for this. “Restart list after:” defines if the numbering for a level will reset, after a higher level is used. Ordinarily this will be the level immediately above the current level, but there may be circumstances where it is not appropriate to reset a level when the immediate higher level is reset.

Number Position: These controls define where the number will appear. “Aligned at:” is the horizontal location for the number. “centre” will cause the number to be centred at that point. “right” will cause it to be right aligned (extend to the left). “left” will cause it to be left aligned (extend to the right).

Text Position: This controls how the text will appear alongside the number. Unsurprisingly “Follow number with” defines which whitespace character (if any) will follow the number. “Text indent at:” controls the “left indent” on the paragraph. “Add tab stop at:” allows an optional tab stop to be specified. In most circumstances, it will be appropriate to follow the number with a tab character, which will cause the associated text to appear as a block with the associated number to the left. However there is enough flexibility to be useful in a variety of settings.

Link level to style: This characteristic allows each level to be linked to an existing style. It is important to note that all this does is causes the style to be applied to a paragraph when the level is selected, and cause the numbering to be applied to a paragraph when the style is selected. It does not unify the characteristics defined separately in the style and the numbering, such as font, tab stops, alignment and indenting. If these are different Word can display some odd behaviour.

Style inheritance

By default, when a new style is created, it will be “based on” the style that was selected when the new style was created. The style another style is “based on” can be changed in the modify style window:

Modify style window in Word 2019 for Macintosh

I will refer to the “based on” style as a style’s “parent”. In Word, styles inherit characteristics from their parent. A child style will use its parent’s characteristics unless it specifically defines it differently. Understanding and using style inheritance makes using styles more powerful and efficient.

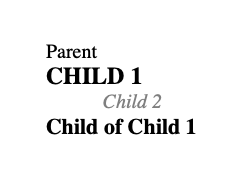
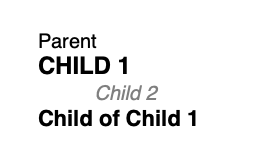
This is probably best explained by example. The parent style is:

  • Helvetica
  • 10 pt
  • Black text
  • Right aligned
  • 0cm left indent

Child 1 is intended to be a heading. It adds the following characteristics:

  • Bold
  • 12 pt
  • All Caps
  • Keep lines together
  • Keep with next

Child 2 is intended to be a block quote. It adds the following characteristics:

  • Italic
  • Grey text
  • 1cm left indent

Child of Child 1 (grandchild style of the parent) is intended to be a lower level heading. It adds the following characteristics:

  • 11pt
  • Not All Caps

All of the undefined characteristics are inherited from their parent. Here is a table showing each of the characteristics of each style:

ParentChild 1Child 2Child of child 1
Helvetica
10 pt
Black text
Right aligned
0cm left indent
Helvetica
Bold
12 pt
Black text
All caps
Right aligned
0cm left indent
Keep lines together
Keep with next
Helvetica
Italic
10 pt
Grey text
Right aligned
1cm left indent
Helvetica
Bold
11 pt
Black text
Right aligned
0cm left indent
Keep lines together
Keep with next
Styles

As you change a parent style, these changes will flow through to its children. For example, changing the typeface of the parent style from Helvetica to Times causes all of the styles to change typefaces.

Styles in Times

Changing the typeface of Child 1 to Copperplate will change its child (child of child 1), but neither of the other styles, as they do not inherit from Child 1:

Child 1 changed to Copperplate

Changing the colour of the parent style to red changes the colour of all of the styles other than Child 2. This is because the colour of Child 2 was already defined as being grey.

Parent changed to red

This is all to say that style inheritance allows dramatic, yet consistent changes of styles throughout a document with relatively little effort. While it may seem daunting to have to select the correct style to be the parent, the rule of thumb is to create a style based the most similar style that exists in the document – Subheading to be based on a heading, indented paragraph text to be based on regular paragraph text.

Evils of “Paste Format”

Paste format allows you to apply the direct formatting from one paragraph of a document to another. On its face, “paste format” appears to be a functional alternative to using styles. It solves the consistency problem with direct formatting instead of styles. Is this a simple solution to the other frustrations with styles? No!

While paste format does leave you with two consistently formatted paragraphs, it does not make managing the document easier in the future:

  • The formatting of the two paragraphs are not linked; changing one paragraph will not affect the other;
  • it does not make it easier to apply those characteristics to other paragraphs in the future;
  • it does not have any of the other features of styles that make working with Word easier.

If you are being tempted with paste format, give styles a go. Of course if you are using a properly styled document, just apply the appropriate style… but if you were already using styles, paste format would have no temptation. But even with a poorly styled document, using styles are an effective alternative to Paste Format – simply create a new style from the paragraph you want to copy the formatting from, then apply that style to the second paragraph. This is not best practice, but it is preferable to paste format. Now you have started, consider styling the rest of the document.

Creating and editing styles

As expanded elsewhere, the main concern when first using styles is mixing them with direct formatting. The best way to avoid this is to become very comfortable making new styles. While reuse of styles is key to their usefulness, never take an existing style and just change the indent, or make any other paragraph-wide change without creating a new style. Create a new style whenever a paragraph is distinct from any previously created style. In other words, if there are no previous styles that are appropriate and you feel compelled make a change to a whole paragraph (ie other than bolding a single word), create a new style.

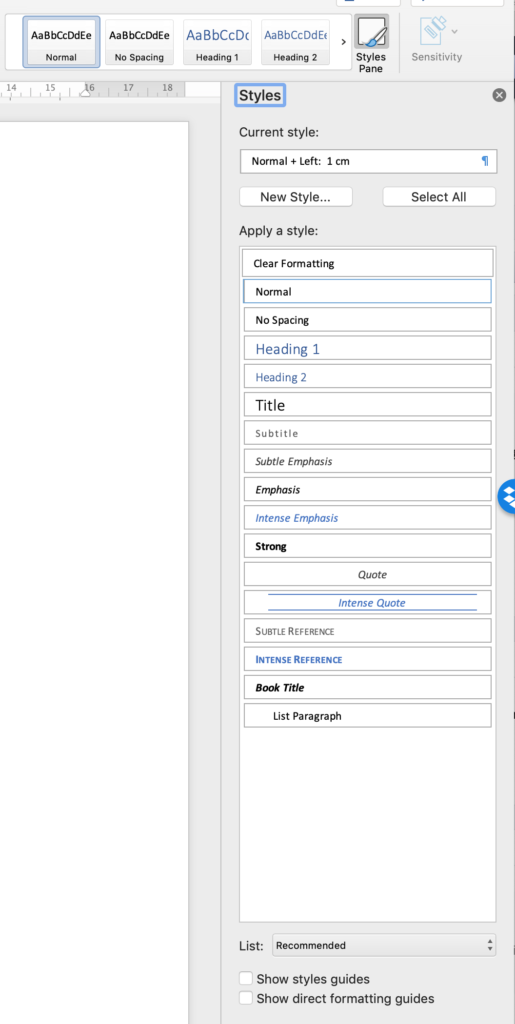
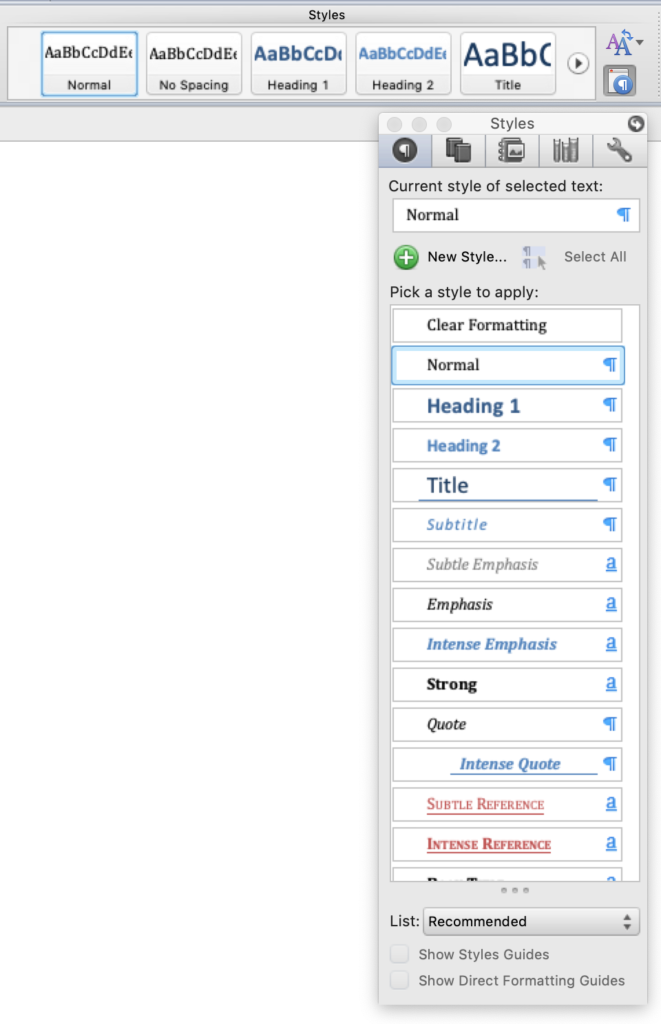
The most accessible way to create a new style is through the “Styles Pane”. I recommend always having this open when using Word, as it makes using styles easier.

There are different ways to create and modify styles. They can be safely mixed and matched. There is no “correct” approach, but I recommend starting by cloning an existing style, and becoming comfortable with the modify style dialogue box.

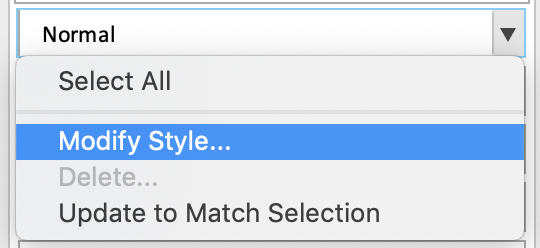
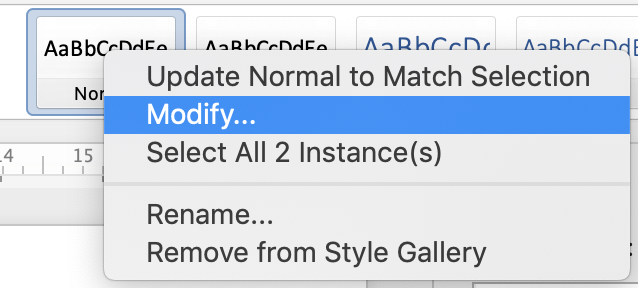
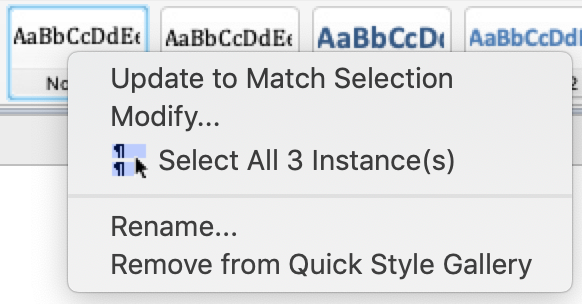
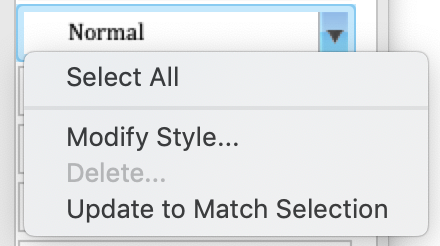
Clone an existing style, and then modify the new style. Select a similar style, then create a new style without making any other modifications. Once the new style is created, select the style, and modify it (generally this can be done by clicking the down arrow next to a style or right clicking on the style and selecting “Modify…” or “Modify Style…”). From the modify style window, the different characteristics of the style can be modified directly. This approach is less WYSIWYG, but the changes can be made directly to the characteristics.

Modify an existing paragraph before creating a new style. When a new style is created from a paragraph with paragraph-level direct formatting (ie not changes to individual words), the new style adopts and those styles and removes the direct formatting. For example, a paragraph is nominally the “normal” style, but it has been indented 1cm. Creating a new style when that paragraph is selected will result in a new style that has the new indents. This approach can be useful if the edits are easiest to make visually. It can also be very useful when working with an existing (predominantly direct-formatted) document. I will talk about how to convert a directly formatted document to styles in more detail in a later post.

Once a style is created, it can be further modified either using the “Modify…” button mentioned above, or by directly formatting the paragraph, and directing Word to “Update the to match selection” (another option that appears with “Modify…”). This is essentially the counterpart to creating a new style from a directly formatted paragraph. As in that case, “Updating the style to match selection” embeds the direct formatting into the style. In general I discourage this approach, as it can be risky. If the paragraph has direct formatting you are not aware of, the characteristics of that direct formatting will become embedded into the style without your knowledge. However despite the risk, there are circumstances when this is essential.

Paragraph characteristics

These are probably the characteristics that require the most changing throughout a document.

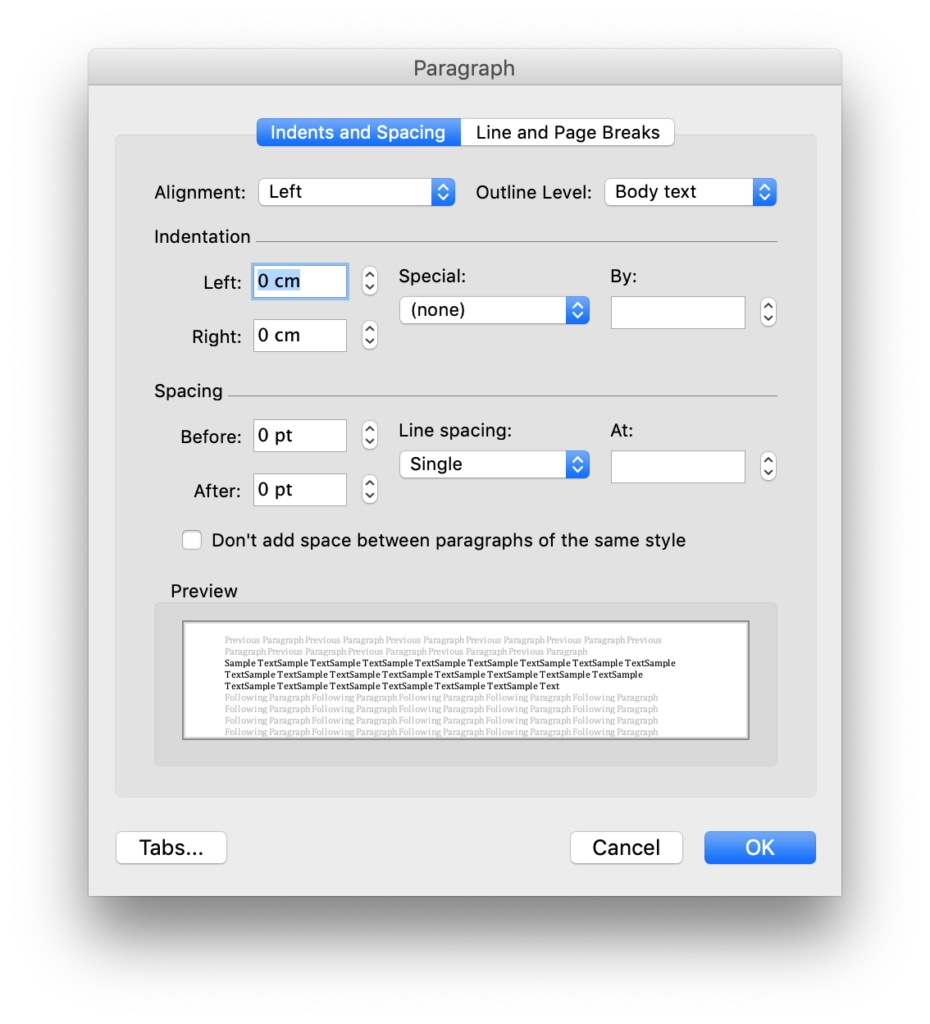
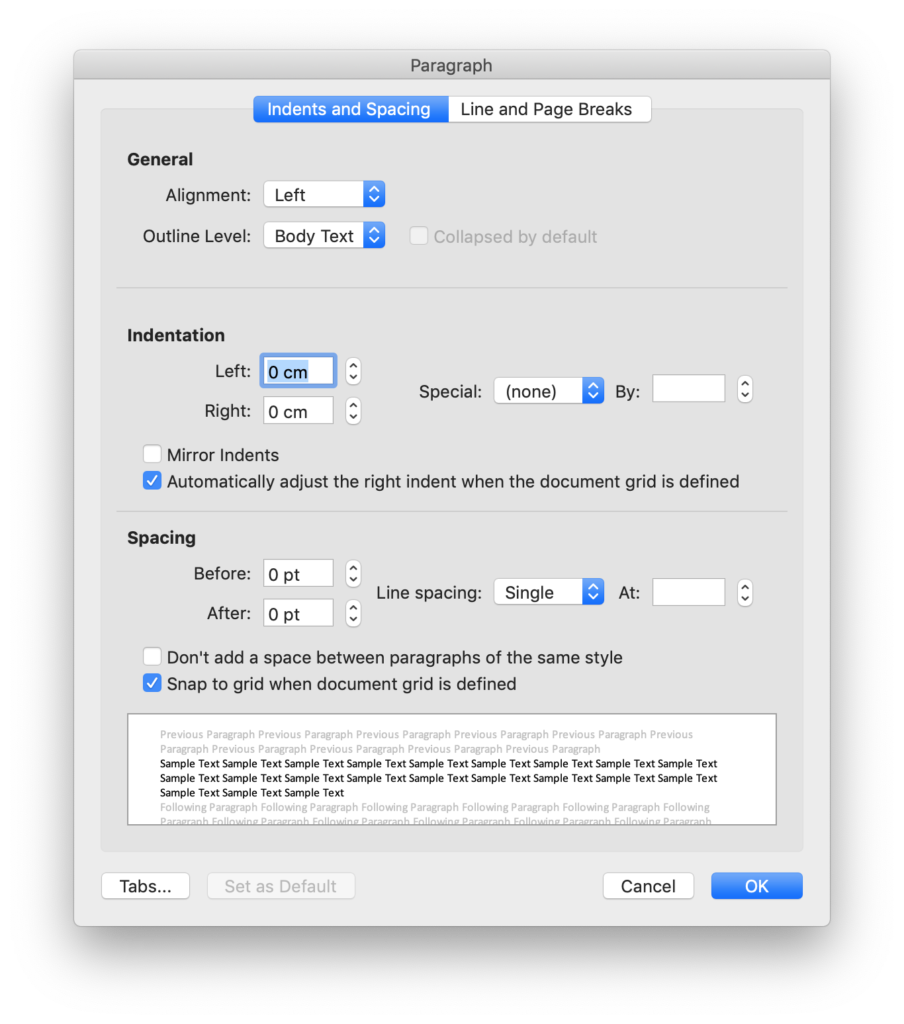
Indents and spacing

Paragraph alignment

Hopefully these are apparent. The simple way to think about it is “indentation” is horizontal white space, while “spacing” is vertical white space.

  • Alignment: Left causes the left side of the paragraph to be aligned.
  • Alignment: Right causes the right side of the paragraph to be aligned.
  • Alignment: Centre align causes the paragraph to be aligned centrally – in other words, each line with have equal white space on each side.
  • Alignment: Justified causes both sides of the paragraph to be aligned (other than the right character of the last line). It does this by adding extra space between the characters within the line.

Outline level

Outline level is an invisible characteristic that tells Word about the importance of the paragraph in the structure of the document. Word relies on outline level for some features, perhaps most obviously table of contents. The levels are numbered, with the most important being Level 1. Body text is text that does not have any level. In short, use the levels for headings, and body text for everything else.

“Outline level” is also used in the “outline view”, and the navigation pane.

Indentation

This controls the horizontal white space within the “paragraph box”. For regular paragraphs, the paragraph box will be defined by the margins of the page. For paragraphs inside a table, this is defined as the margins of that table cell.

Left / Right – this is the spacing from the right and left side of the paragraph box. A paragraph can extend beyond the paragraph box by putting negative numbers here.

SpecialFirst line – this causes the first line of the paragraph to be specially indented, with the remainder of the paragraph having the otherwise assigned indent.

SpecialHanging – this is the opposite of “first line”. The first line has the assigned indentation, while the remainder of the lines are separately indented by the distance given.

Mirror Indents – this switches the “left/right” indents to “inside/outside”. This is useful when preparing a document that will be printed on two sides, and bound. It changes the control of spacing from the left and right of an individual page to the “centre”, and “edge” of a bound document.

Spacing

“Spacing” controls the vertical white space, between paragraphs as well as inside.

“Before” / “After” is how much space there is before and after each paragraph. This can be set to “Auto”, which appears to be the same as “14pt”. I have no idea why.

Line spacing – This controls how much spacing there is between each line of text. There are many options

“Don’t add space between paragraphs of the same style” does pretty much what it says – it eliminates the “before” and “after” spacing between paragraphs of the same style. However it does not override “line spacing”.

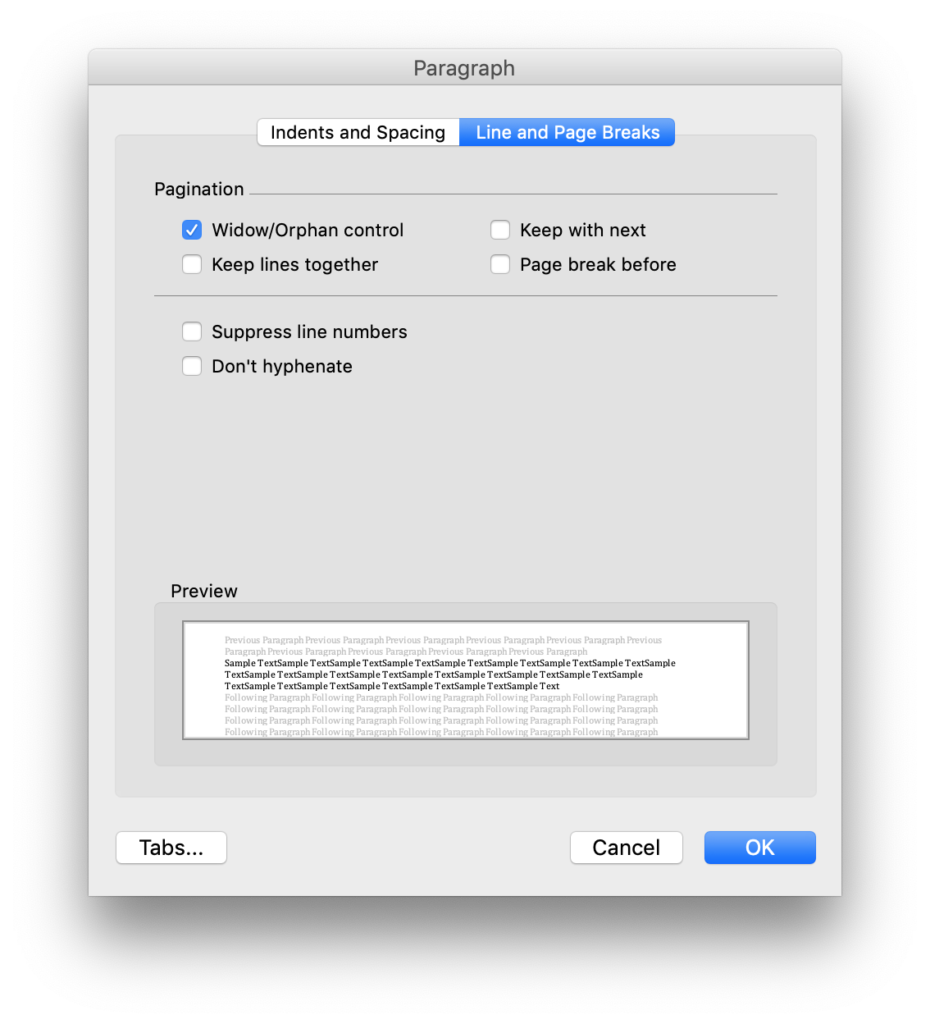
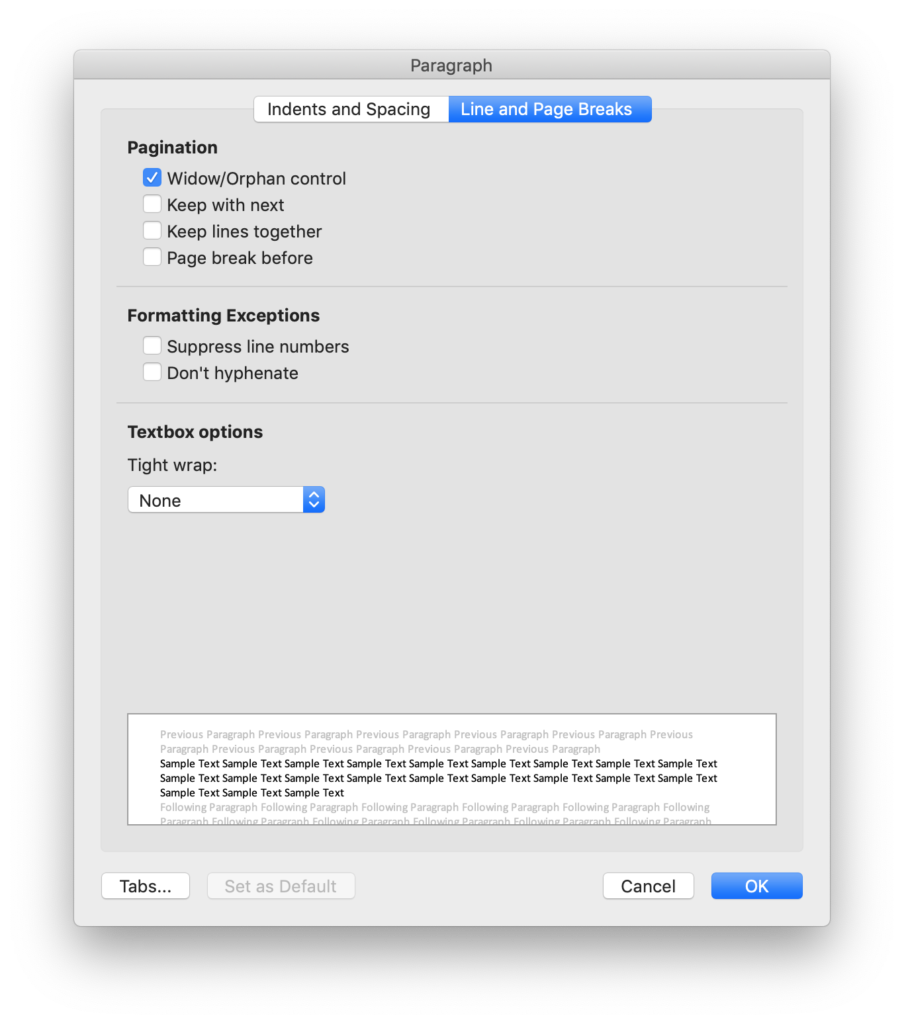
Line and Page Breaks

These controls are generally less obvious, but they are essential to construct a competently formatted document. If Word is showing formatting marks and one of these characteristics is active (other than widow/orphan control), a little black square will appear just to the left of the paragraph to make it clear that Word is treating these paragraphs differently.

Many of these characteristics control when Word can break text across pages, incorrect use of which which can cause Word to behave oddly with page breaks. For example, Word will not split consecutive paragraphs with “keep with next” and “keep lines together”. If Word is forcing a paragraph onto the next page for no apparent reason, check to see if these characteristics are being misused.

Widow/Orphan control – This unfortunately named feature relates to when a single line of a paragraph is left by itself when the paragraph is split across pages (or columns). Widows are the last line of a paragraph alone at the top of a page. Orphans are the first line of a paragraph abandoned at the bottom of a page. Turning on this function eliminates widows and orphans by ensuring that there is at least two lines of a paragraph on each page (or column). This can be useful for aesthetic and context.

Keep with next – paragraphs with this characteristic are bound to the following paragraph. If the paragraph after this is on the next page, this paragraph will follow it over. This is an essential feature for headings, as it ensures the heading is not left at the bottom of a page without any text it relates to.

Keep lines together – This prevents a paragraph from splitting across pages. This can be useful for headings.

Page break before – This causes a page break immediately before the paragraph. This is a brilliant feature where a section of a document (such as a Schedule) should start on a new page.

Suppress line numbers – Paragraphs will not count towards the line numbers. Line numbers will also not appear next to these paragraphs.

Don’t hyphenate – I have never used this one. I expect it causes Word to block hyphenation in this paragraph.

Mixing styles and direct formatting

Mixing styles and direct formatting causes some of the biggest headaches in using Styles in Word by causing inconsistent and incoherent behaviour. Updating the style will inconsistently overwrite any direct formatting.

For example, a simple document with two styles: “Heading”, which is Helvetica size 12, and “Body” which is Times size 11. In the course of preparing the document, the writer decides to insert a quote and indents and italicises some Body text.

The writer does this manually, directly formatting the text. The document now has some paragraphs of “Body” without any direct formatting, and some other “Body” paragraphs that look quite different.

The writer now decides to change the font to Charter. Depending how this is done, all paragraph level direct formatting (such as indenting and italics) may be lost. Alternatively, the writer decides that italic Helvetica looks good, and decides to change the Body style to now be italic. Depending how this is done, it may cause the previously italicised text to stop being italic.

Expand this to working with a long, complex document with a heavy mix of styles and direct formatting, and it is disastrous.

Frustratingly, Word does essentially nothing to stop a user adding direct formatting to a styled document.

The exception – emphasis

The one exception to this is adding emphasis, though direct formatting to one or more words within a paragraph. Word tends to preserve this formatting without problem.

Why Styles?

Why use styles?

There are four main reasons to use styles.

Consistency – Proper use of styles allows your document formatting (and other characteristics) to be consistent throughout the document. A paragraph with a style on the second page of a contract will have the same formatting as a paragraph on the 60th page of the contract.

Editability – A document made with styles is much easier to edit and modify after the fact. Changing the indenting, or typeface is simpler and more reliable in a styled document. It is relatively simple and safe to experiment with different structures and appearances in a document. Thanks to the first factor, these changes will be consistent throughout the document

Features – Word’s styles enables many features that are either unavailable, or not practical with direct formatting. For example the automatic table of contents maker can be used without styles, but it is more practical with styles. Styles can ensure a contract’s schedules always starts on a new page. Styles can tell Word that particular paragraphs are in different languages, affecting spell and grammar checking.

Numbering – Word handles numbering and multi level lists separately from styles, however they are most effective when they are used together. Competent and efficient numbering is essential to many legal documents.

Why should lawyers use styles?

More than most professions, lawyers work with complex documents that require consistency and precision. Without the benefits of styles, these complex agreements are likely to have inconsistent indenting, or mis-numbering (or worse, hand-numbered paragraphs). This may mean inserting a clause into a contract requires renumbering the whole document or manually changing the cross references.

What are styles?

Word has two ways of formatting text:

  • Direct formatting; and
  • Styles.

Direct formatting embeds the formatting alongside the text. Each paragraph of text holds its own formatting information. It is simple and, well, direct.

Styles separate formatting from the text. Styles group characteristics. Paragraphs are then assigned a style. , automatically apply the style’s characteristics. Updating the style updates the paragraphs with that style. Applying a style to a new paragraph applies the characteristics to that new paragraph.

Direct formatting is simple to understand and to use, however it falls down with longer, or more complicated documents. In particular:

  • As each paragraph contains its own formatting, if there is need to change the formatting of a document, every paragraph must be changed separately.
  • It is difficult to ensure consistency across a document. It is very difficult to ensure that a heading on the third page has the same formatting as a heading on the tenth page of a document.

Styles solve both of these problems. Changing a style’s formatting will apply that formatting to all paragraphs with that style. Similarly, if a paragraph on the third page is the same style as a paragraph on the tenth page, they will share their formatting.

For better and worse, Word allows direct formatting and styles to mix. A single paragraph can have a style as well as be directly formatted with the direct formatting overruling the style. This can be powerful, but it can make using styles confusing. By default, Word will apply direct formatting instead of changing a paragraph’s style. This can mean that a careless Word user can quickly sully the most beautifully styled documents with direct formatting without realising it.

For example, a document has two styles: a Heading style with Helvetica size 12; and a Body text style with Times, size 11. Taking a Body text paragraph, and changing the font to Helvetica, the size to 12, will not change the style of the paragraph to Heading, it will simply apply all that formatting as direct formatting to that paragraph.

What styles are not

It is also worth stressing what styles are not. Styles are not the blue headings in Word’s ribbon. The blue headings are examples of styles, but can give a false impression of how styles should be used. The power of styles is not to allow people to find the appearance of a style they like, but rather to create and modify styles as needed.

Styles are also not just how text looks, but also how it works. Styles affect many aspects of text function including spacing, how text flows from one page to another and the language of text.

Purpose of this website

I felt compelled to make this website after years of encountering legal documents with broken and inconsistent formatting.

Too many people using Microsoft Word do not know how to use styles to make their life easier, and their work better. Trying to make complex documents in Word without careful use of styles is frustrating, and in some cases futile. Unfortunately Word does little to help, creating a false impression of what styles are, and often tricking people into using them incorrectly.

Legal documents are necessarily precise. In language as well as presentation. Inconsistent indenting or numbering can materially change a document’s interpretation. Styles are the best way to ensure the presentation of a Word document is consistent and precise.

The purpose of this website is to help people use Word styles to improve their documents. This website has a particular focus on legal documents, but it should be useful to anyone using Microsoft Word.

Along the way, this site will also detail many of the ways that styles fail, and how to cajole Word into doing the right thing.